At A Glance
- Step-by-step guide to designing hydronic radiant floor systems
- How to size boilers, calculate heat loss, and plan PEX layouts
- Importance of proper under-slab insulation and thermal breaks
- Critical install details: expansion joints, pressure testing, and slab prep
- Proven strategies to improve system performance and long-term reliability
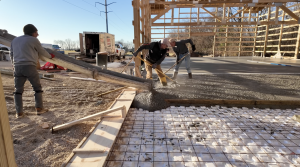
If you install hydronic radiant floors in the homes you build, you know you only have one shot to get the job done right — once the concrete gets poured, there’s no more room for error. That’s why it pays to plan each radiant floor job with care and to pay attention to the little details that can affect the floor’s performance, efficiency, and durability.
In the post below, we’re sharing a guide on best practices for planning and installing hydronic radiant floors.
To prepare this guide, we’ve reached out to Adam Carter, C.E.T. RASDT, RHDT, Senior Designer at Ontario-based Canada HVAC Design. Adam has many years of experience in designing hydronic radiant floors, so he’s well aware of all the nuances a builder must keep in mind to install an energy-efficient, high-performance system.
The tips below follow a chronological order, from system design to the concrete pour.
Step 1 — Establish Your Heat Source
The first step when designing a hydronic radiant heat flooring system is to select your heat source. In theory, gas, propane, and electric boilers are available.
However, suitable electric boilers are not currently as available in North America as they are in Europe, so gas or propane are the more straightforward fuel options if you’re in Canada or the US.
Step 2 — Choose the Boiler Type
Once you’ve zeroed in on the desired fuel, you should choose the boiler type. Combination boilers (called “combis” for short) are the go-to option for hydronic radiant floors. Combis get their name from their ability to provide both central heating and domestic hot water, and do not require a hot water storage tank since they supply hot water directly on demand.
However, note that combi boilers cannot provide both central heating and hot water to your taps at once.
They always give priority to domestic water, so you should find a combi of a high-enough capacity to keep the radiant floors hot while you’ve got a tap or shower running.
You can use LoopCAD to determine the appropriate BTU output for the boiler (more on LoopCAD in the next step).
Step 3 — Determine System Heat Gain and Heat Loss
Now that you know what fuel and boiler type you’ll use to heat the radiant floor, you should calculate the system heat gain and loss to determine the boiler capacity and the required length of PEX tubing.
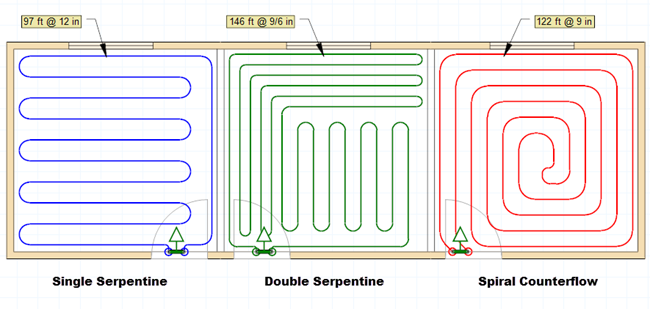
To do this calculation, you can use the LoopCAD software, which automatically generates a hydronic radiant floor heating circuit based on your inputs. LoopCAD also gives you the following values:
- Required water temperature: Typical range is 80-100°F. For reference, the maximum slab temperature allowed by code is 87-88°F.
- Boiler BTU output: Maximum 32 BTU per square foot of floor, but you may get away with far less while providing sufficient heat.
- Boiler flow rate: Typically 0.2-0.3 gallons/minute per loop
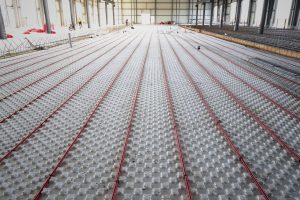
- Tubing length and loops: Typically, the pipes are spaced 9 inches on center in a loop. However, you can increase the spacing to 12 inches on center if needed. Most residential applications require a ½-inch diameter PEX tube, which costs roughly $0.20/linear foot and comes in 300-foot rolls.
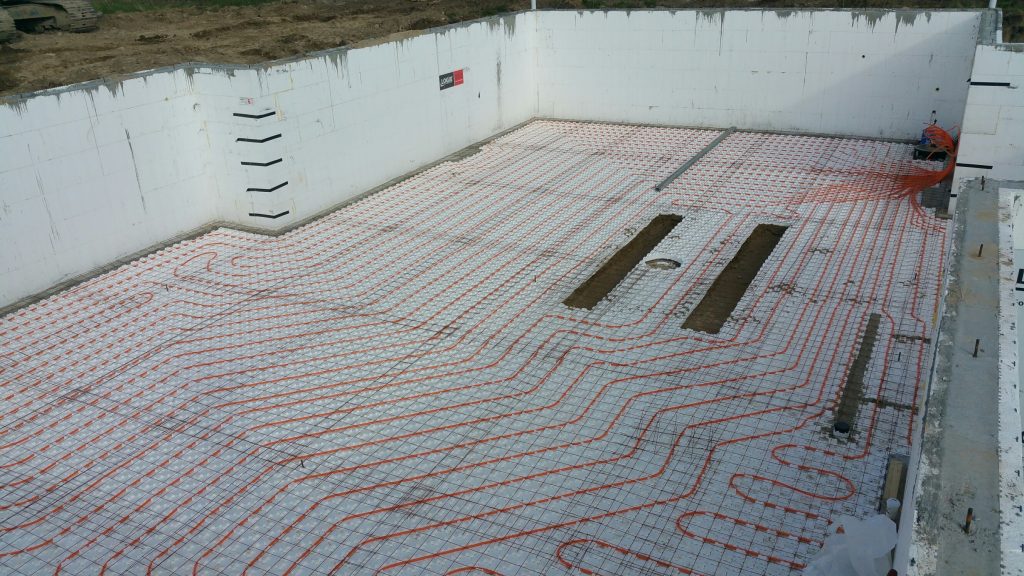
Step 4 — Insulate the Slab and Create Thermal Breaks
The slab with radiant floor heating must have thermal breaks to prevent heat transfer to the foundation.
ICF foundations are ideal for this purpose, as they are insulated already. However, if you’ve got a regular concrete foundation, you’ll need to insulate the slab edges with at least a 1-inch rigid/foam insulation board. This is a detail that some inspectors can miss, but doesn’t mean that you should let it slide — heat will leak out and weaken the efficiency of your radiant floor.
On top of the edge insulation, you must have at least R-10 of insulation beneath the slab to prevent heat transfer downward.
Heat-Sheet is the ideal product in this case, as its EPS panels provide both the required R-values and nodules designed specifically to accommodate PEX tubing.
Step 5 — Install an Expansion Joint
It’s important to have an expansion joint where the PEX tubes exit the slab. Expansion joints protect the PEX tubes from damage if the slab moves in any way.
Don't miss a thing!
Subscribe for exclusive content, insider industry news and limited edition webcasts.
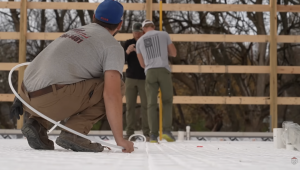
Step 6 — Pressurize the PEX Tubes Before the Pour
A good way to ensure the PEX tubes are intact is to pressurize them to 60 PSI before the concrete pour and inspect them for leaks. In fact, you should leave the tubing under pressure during the pour and for 3 days after, as doing so will help you spot damage to the tubes before the concrete cures and repairs become costly.
Wrapping It Up
We hope our best practices guide above will help you design and install efficient, reliable hydronic radiant floors.
Remember that early planning is the key to having a system that’s well-suited for the property size, while paying attention to the finer details (like slab edge insulation or providing an expansion joint) helps you avoid costly errors.