Introducing Heat-Sheet®
The Advanced Radiant
Floor Panel System
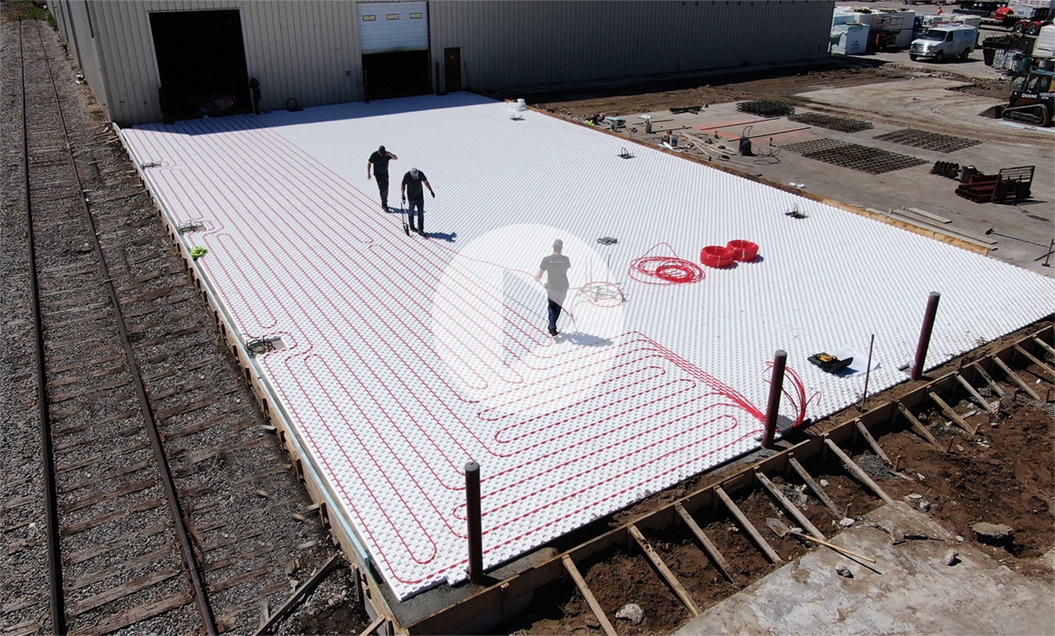
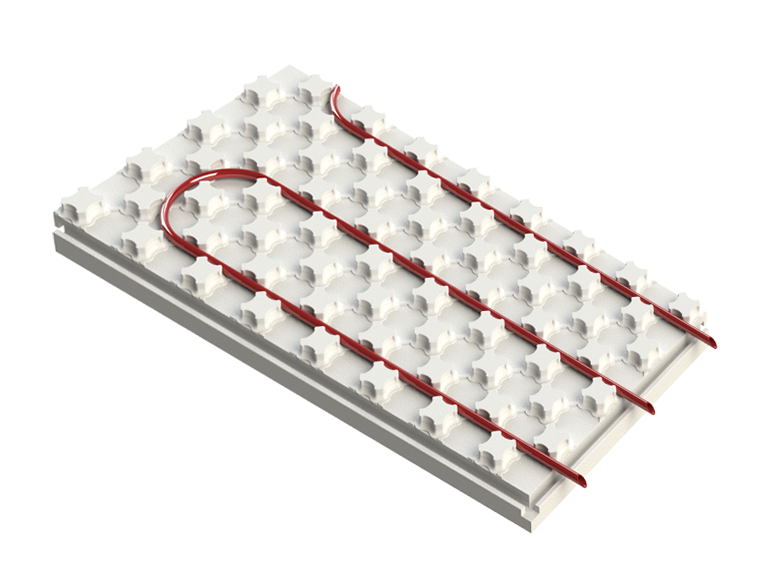
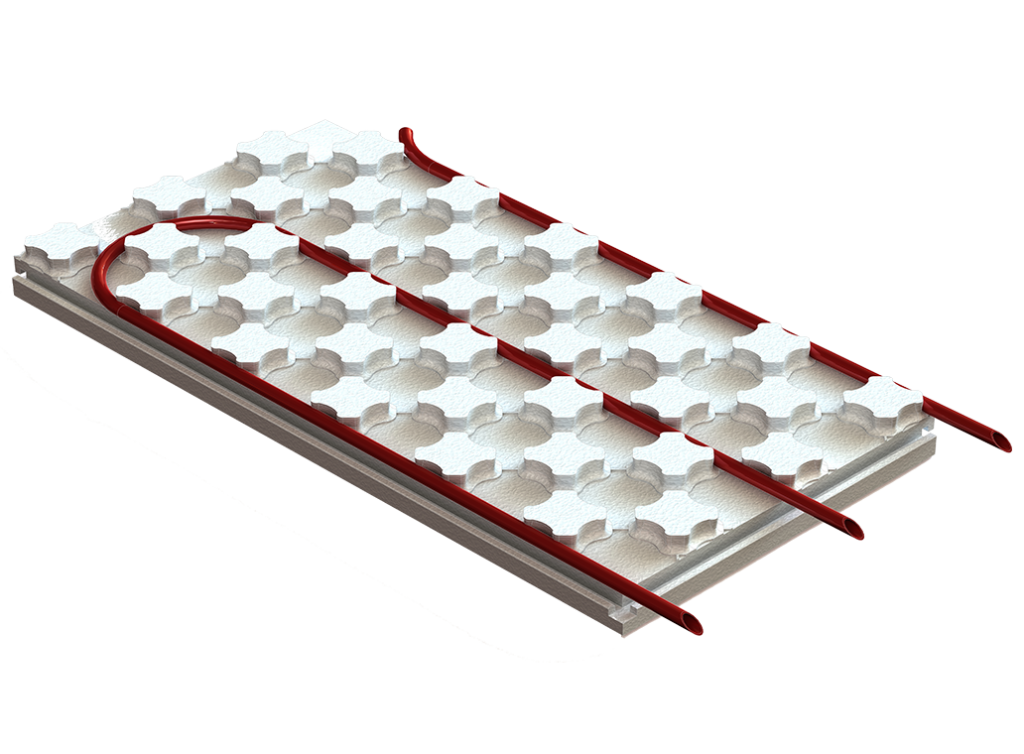
Compact 4’ x 2’ Heat-Sheet radiant floor panels are convenient to stock, easy to install and provide continuous insulation.
Heat-Sheet panels are engineered to save up to 75% of pex pipe installation labor and can eliminate taping and poly.
Meet Heat-Sheet®
Heat-Sheet®
R4 - R16.1
Perfectly Designed for Under-Slab,
Slab-On-Grade and Retrofit Applications
Heat-Sheet® Heavy
R8 - R20
Perfectly Designed For Snow-Melt,
Garage and Commercial Heated Floors
Where to Buy
Heat-Sheet® Products
Search by Address, City or Zip/Postal Code to find the closest local dealer.
EZ 1-2-3 Installation
- Ensure the ground is reasonably level. Install a vapor barrier if required.
- Place Heat-Sheet panels. Interlock the panels together and create a running bond pattern.
- Walk tubing into place. A plastic staple may be required on the turns. Place wire mesh and rebar, if required, on the panels
-
Start pouring concrete: Full installation instructions are available for download.
Dig A Little Deeper
Watch An Introductory Webcast (20 min)
Register For The Next LIVE
Interactive Webcast
- July 23, 2026 11:00 am
- 1/2 hour | Highly Interactive Online Webcast
Watch A Previously
Recorded Webcast NOW
Search Anything
Request a Quote
Whether you are just starting out or well on your way toward your next big project, we would love to hear from you.
By submitting the form, you agree to our Terms and Conditions and our Privacy Policy. This site is protected by reCAPTCHA and the Google Privacy Policy and Terms of Service apply.
Ask Anything
General Inquiries
Whether you are just starting out or well on your way toward your next big project, we would love to hear from you.
By submitting the form, you agree to our Terms and Conditions and our Privacy Policy. This site is protected by reCAPTCHA and the Google Privacy Policy and Terms of Service apply.
Request a Quote From a Dealer
Whether you are just starting out or well on your way toward your next big project, we would love to hear from you.
By submitting the form, you agree to our Terms and Conditions and our Privacy Policy. This site is protected by reCAPTCHA and the Google Privacy Policy and Terms of Service apply.
Thank You for Your
Interest in Heat-Sheet!
Request a Quote
Radon Diffusion Applications
Whether you are just starting out or well on your way toward your next big project, we would love to hear from you.
By submitting the form, you agree to our Terms and Conditions and our Privacy Policy. This site is protected by reCAPTCHA and the Google Privacy Policy and Terms of Service apply.
- Exclusive Content
- Insider Industry News
- Limited Edition Webcasts
Don’t Miss a Thing!
- Exclusive Content
- Insider Industry News
- Limited Edition Webcasts
Almost there...
For unlimited access to all of our technical and marketing resources, please enter your information. We will also email you a copy of each of the items you select for quick future reference.
By submitting the form, you agree to our Terms and Conditions and our Privacy Policy. This site is protected by reCAPTCHA and the Google Privacy Policy and Terms of Service apply.