Are you thinking about installing hydronic radiant floor heating in your new home?
If you are this post will get you started with a basic high-level overview.
How Does Hydronic Radiant Floor Heating Work?
Hydronic floor heating works by circulating hot water through a network of pipes beneath the surface of a high mass, usually concrete, floor. The pipes get their hot water from your boiler but work separately from your potable or greywater systems. These millennia-old systems are surprisingly easy to operate and their design is based on a few basic principles.
That said, be sure to get a licensed installer’s assistance before you embark on your project just to make sure your system is designed correctly and properly installed — once that concrete cover is poured, making changes to your piping network will be costly and labor-intensive.
What You Need to Get Started
Hydronic floor heating systems comprise 4 key components. You’ll need to plan their quantities and layouts before getting to work with the installation.
You should also figure out your expected heating load in BTUs. This calculation is best left to a professional, but a typical new, well-insulated home will need approximately 30 BTUs/ft2 for optimal heating, whereas larger spaces and older buildings can require outputs of 50 BTUs/ft2 and up. Snowmelt systems can require up to 150 BTUs/ft2 to work properly.

PEX (or PE-RT) tubing
These are the pipes that carry hot water under the surface of a floor. You’ll need to figure out the right pipe diameter, spacing, and circuit length to make sure you purchase the right quantity.
Let’s start with diameters:
- ½-inch diameter PEX pipes are the most popular choice for most residential (and commercial) applications
- ⅝-inch diameter pipes are somewhat less common but suitable for projects with thicker concrete slabs or heavier heating loads
- ¾-inch diameters are best for snow-melt applications, or if you require a very high heating load. (You’d need to use Heat-Sheet Heavy panels with this pipe diameter.)
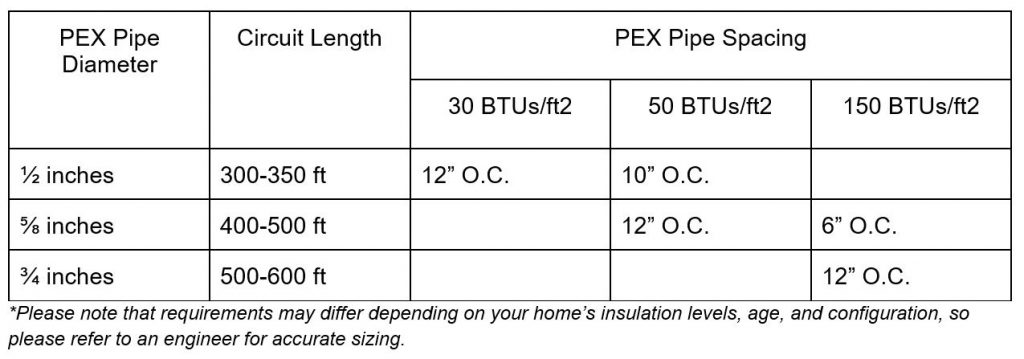
Once you determine which pipe diameter suits you best, you then have to figure out your spacing and circuit length. Here are some rough guidelines:

Staples
Though using Heat-Sheet panels will spare you from having to staple PEX pipes every few inches to keep them in place, you’ll still likely need staples at the pipes’ turns.

Heat-Sheet Panels
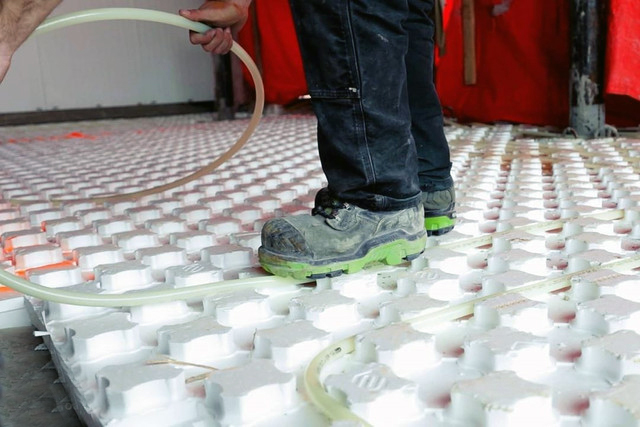
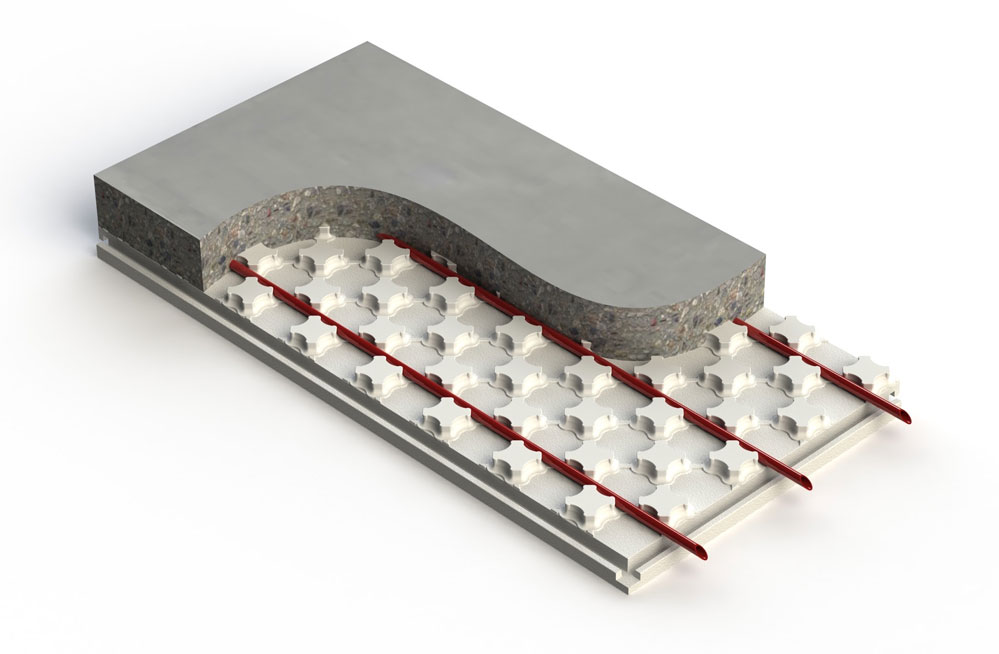
These panels insulate your PEX piping from the bottom, ensuring that precious heat doesn’t escape downward. Crucially, these panels also lock the PEX piping in place and facilitate the installation of the piping up to 4x faster.
Once you know the floor area of the space you need to heat, and the piping diameter, calculating your Heat-Sheet quantities using our One Minute Estimator becomes a breeze.
Since Heat-Sheet panels are each 8ft2, simply divide the floor area you want to heat by 8, and you have your required panel quantity. Heat-Sheet comes in bundles, and the panel quantity depends on the panel type and size. You can use this table to figure out how many bundles to order:

Concrete
Getting the concrete cover right is crucial — too much, and your system will lose heat; too little, and you won’t meet your design requirements. The desired cover is usually 1-2 inches above the Heat-Sheet nodules but be sure to get proper confirmation from your HVAC designer.
It takes 0.043ft3 of concrete to cover 1ft2 of Heat-Sheet to the top of the nodules, and 0.083ft3 of concrete for each additional inch.
Sample Calculation
Suppose you’re laying PEX piping in a room that’s 400ft2. You’ll need:
50 Heat-Sheet Panels (400ft2 / 8 = 50 panels)
83.6 ft3 of concrete to produce a 2-inch cover above the piping (400 x (0.043+0.083+0.083) = 83.6ft3)
Wrapping It Up
With planning out of the way, you’re ready to install!
Heat-Sheet is the easy part — it’s tailor-made to make PEX tubing installation fast, simple, and back-pain-free! If you want to learn more about the install process, please consult this guide. Remember — it’s always best to leave system sizing and installation to the pros.


